Artiglio
Excellence in componentsLanguage: English
 |
 |
 |
 |
 |

 Printable version
  Request informations
  Tell a friend…
| G.C. 34 - G.C. 38 Hinge
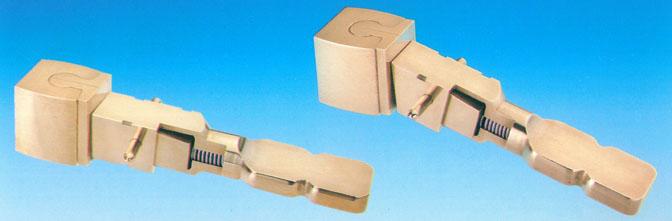
G.C. 34 - G.C. 38 Hingeresilient attachmentThe extracoronal removable hinge Grifo, a well-known dental attachment international, is available in two different versions: - G.C. 34 - G.C. 38 It is intended to retain the removable denture to one or more pillars of single or double-sided saddles. Easy to apply, it is made up of two main parts: - matrix, composed by one element: female; - patrix, composed by four elements: male, pin, spring and sheath, easily interchangeable removing the pin placed laterally to the sheath. The adjustable male, provided with female supporting shoulders of cylindrical shape, gives an extremely precise guide offers an extended contact surface preventing lateral swing. The sheath contains the spring housing and can be provided also with an end reinforcement - available also with stainless steel pins to be modeled on saddles - to be better retained in the resin. Grifo attachments G.C.34 and G.C.38 can be provided also with adjustable patrix allowing a more precise activation. 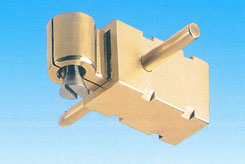 |
Technical features |
|
|
Female |
Patrix |
|
• Five materials: resin alloy, ceramic alloy, ceramic alloy suitable to be cast on, stainless stell, non residual burn-out plastic |
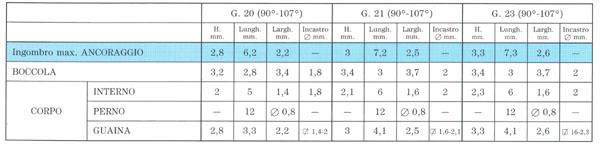
• Four components: male, pin, spring and sheath • Two different dimensions: G.C. 34 and G.C. 38 |
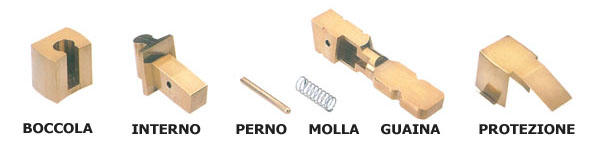
female male pin spring sheath protection
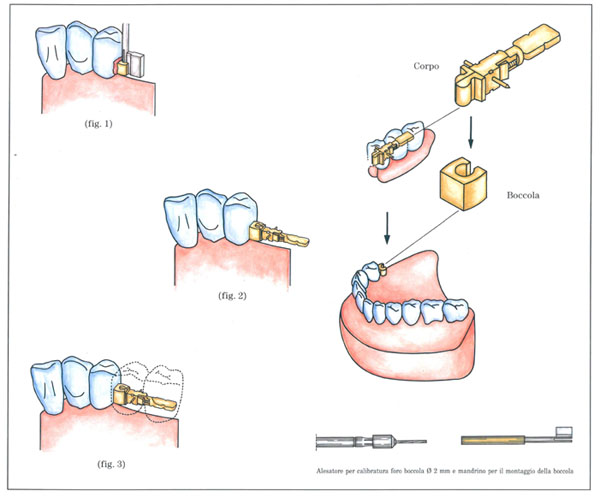
- Wax the female to the crown using the proper paralleling mandrel in axis with the alveolar ridge, leaving sufficient space for the papilla (Fig. 1)
- Investing the crown with the soldering female.
- Assemble the hinge (patrix with the female (Fig. 2)
- Mount the protection on the hinge and model teeth with wax (Fig. 3)
- Before the duplicating, remove the male and the spring.
- Insert the pin to achieve the right mounting of the hinge.